

· PHOTOGRAPHY ·
36 Essential Travel Photography Tips – How to Capture More Sophisticated Shots
Scribbled by Claire ◊ 19 Dec 2024
Are you looking to up your travel photography game? Do the pictures on your wall just fall a little flat? Well, here, I’ve written a whole bunch of ways to improve how you document your travels, from researching your destination, all the way to editing when you get back home.

I’m a travel writer, but really, I’ve always wanted to be a photographer (imposter syndrome kicks in here: am I already one? What makes somebody a photographer?).
Being a travel photographer is my dream job and I’ve spent five years, nearly full-time travelling, taking hundreds (if not thousands) of photos almost every single day, all over the world (my online cloud storage is a *disaster*).
This unexpected photography journey has led me on a path where my standards and skills have gradually advanced and become more sophisticated, to the point where I’m now comfortable taking photos of everything, in any arena. I now pride myself on taking high quality, unique, cinematic travel photography, and can (mostly) make even the most mundane moments shine.
So, in this post, we’re focusing on travel photography and how to elevate your holiday photos, beyond the usual, to the extraordinary. I’ve put together a list of tips that go into making my travel photography as interesting as possible, plus answered a lot of commonly asked questions. Each example is accompanied with photos, where possible, to help illustrate my points.
I hope it’s helpful!

IN THIS GUIDE //
Travel Photography Tips and Guide
TRAVEL PHOTOGRAPHY OR VACATION HAPPY-SNAPS?
WHAT IS TRAVEL PHOTOGRAPHY?
HOW TO USE MANUAL SETTINGS ON A CAMERA
OUR TRAVEL PHOTOGRAPHY – TIPS AND TRICKS
TIPS FOR BEFORE YOU ARRIVE
BEST CAMERAS FOR TRAVEL PHOTOGRAPHY
PHOTOGRAPHY TIPS – ON LOCATION
PHONE OR CAMERA?
ARTISTIC TRAVEL PHOTOGRAPHY TIPS
WHAT IS A RAW FILE IN PHOTOGRAPHY?
TECHNICAL TRAVEL PHOTOGRAPHY TIPS
FINAL THOUGHTS
This post may contain affiliate links. If you book through these links we may make a small commission at zero cost to you. It helps us pay for the upkeep of this blog. Thank you!
Travel Photography or Vacation Happy-Snaps?
A lot of people think that differentiating between holiday snaps and travel photography is a bit, well, pretentious. Spoiler – it’s not. They produce two, totally different end products (and the latter is also a paid, professional career which takes years of mastering!).
Holiday happy-snaps | these are the pretty ‘I was there’ type pictures, ones you send to your family and colleagues to make them jealous. It’s the one of you, sat with a glass of wine in a nice bar on the Amalfi Coast, or maybe quad biking in the Arabian desert; the one of you climbing a Mayan ruin, or just a cute street dog you bonded with in Bali.
These types of (particularly cell phone) vacation photos can still be edited nicely and certainly deserve care, attention and a place on the fridge, your mum’s photo wall or as a screensaver. However, they aren’t, fundamentally, travel photography.
Travel photography | this is more artistic. It commonly shows off the personality of a location, might have a narrative, and has the potential for anyone to appreciate it (which is less likely for a family shot on the beach). The pictures usually have creative merit, possibly with an attempt to evoke some kind of emotion.
At minimum, I imagine most travel photography is supposed to inspire the viewer to visit!
Tip | a question I ask myself often is: would this look out of place in a National Geographic or equivalent travel magazine? Is it good enough? (It’s always best to aim high!).
Obviously, there is often a mix of the two types (just because you are the subject of a photo does not immediately mean it can’t also be high-quality travel photography too).
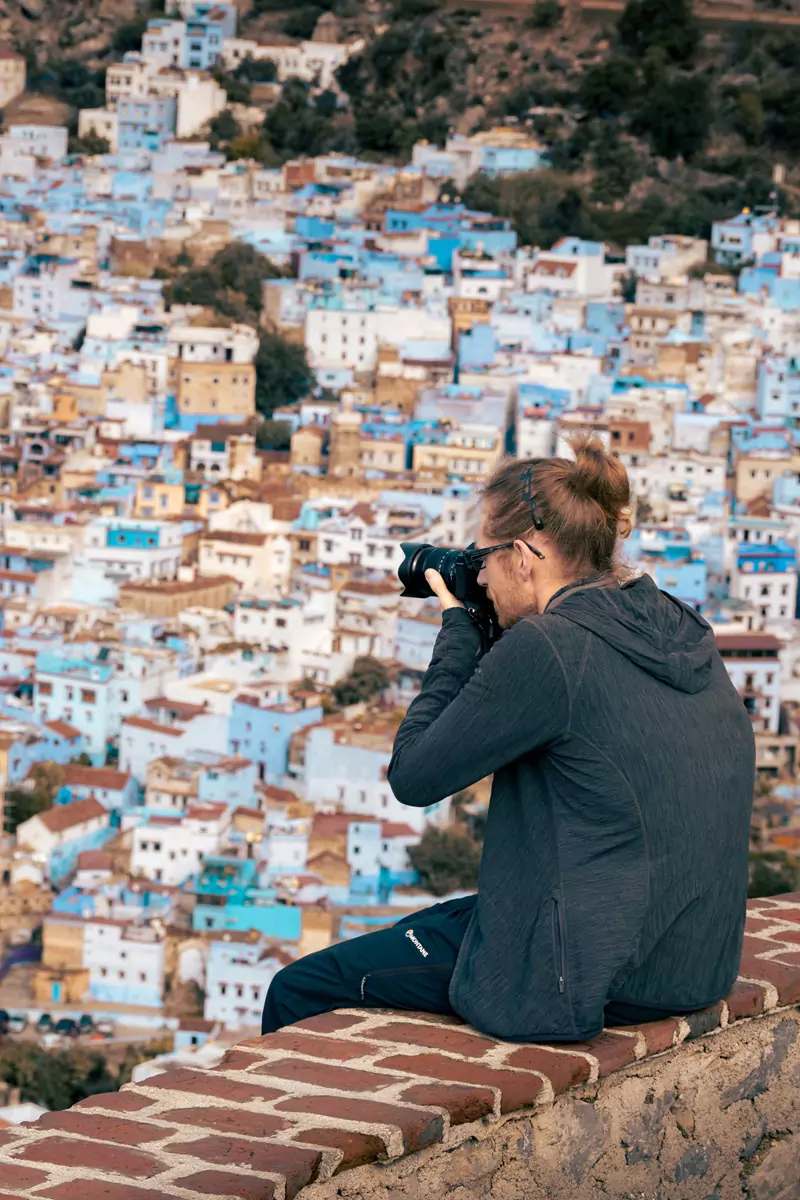

So, What Makes Something Travel Photography?
Travel photography incorporates an extremely tricky, enormously wide combination of genres. I think, fundamentally, the phrase ‘travel photography’ is used as a catch-all for ‘capturing or framing a single moment of a journey or story’.
This type of photography usually takes place in a foreign environment, typically incorporating many facets of the photography world, such as architecture, street, portrait, landscape, low light, action and more.
Within one single (busy) day, you might take:
◊ a long exposure shot of a waterfall
◊ the inside of a shadowy, smoky, temple
◊ a portrait of a street vendor, or even the flames cooking their meat skewers
◊ a street dog dashing after a bird
◊ a classic shot of some colonial architecture
◊ a zoomed in shot of a howler monkey in a jungle
◊ a wide, landscape shot of a skyline against some mountains at sunset
◊ a hectic, crowd-filled religious festival
To be a good travel photographer is to be continuously prepared for the unpredictable and always be on the go.
The ‘travel’ part of this genre also makes it one of the most difficult. It’s possible that, as a visitor, you’re unaccustomed to the weather, which may be swelteringly hot, freezing cold or pouring with rain. You may not speak the local language or know how to get around. Unfamiliarity just contributes to the difficulty of capturing the perfect image.
Suddenly, the job of snapping that once-in-a-lifetime moment seems almost insurmountable!
It’s a tricky genre to master (but don’t fear, anyone can!).

HOW TO USE MANUAL SETTINGS ON A CAMERA
This post is specifically about travel photography tips and how to take the best pictures on your trips.
This means I’m not going to write a detailed guide for how to use your camera or phone (there are so many photography guides on the internet already!). However, below is a simple ‘quick start’ practical guide to using the manual mode on any DSLR/mirrorless camera (skip past this if you don’t need it!).
–> There are only three important settings you must know when using your camera on manual.
Simply put, these three settings adjust how much light your camera sees. So, at any given moment, each photo you take will be based on a combination of these three factors:
————————–
Aperture | the most complicated to understand because it has multiple effects on your photo.
Also called the ‘f-stop’ or ‘f-number’, aperture is written as f/2, f/4 or f/16, for example, where the f stands for focal length. So, counterintuitively, the f/2 value is larger than f/16.
This number literally determines how big your camera’s ‘eye’ is. f/2 is a huge eye and will let in far more light than f/16, for example.
The aperture number also determines your depth of field. This dictates how much of your image depth is in focus. If you want every part of your image sharp and in focus, then make your camera’s eye very small (so an aperture value like f/16, rather than f/2). For a very narrow depth of field and lots of lovely background blur, ensure your camera’s eye is wide open (so nearer to f/2 than f/16).
————————–
Shutter speed | literally the amount of time the camera’s shutter is open, measured in seconds or fractions of seconds.
This determines how much light your camera sees. So, the longer the shutter is open, the more light enters the camera.
Also, the longer the shutter is open, the more movement your camera will see, so if you are photographing a moving subject, you’ll want your shutter open for as short a time as possible (a small fraction of a second).
————————–
ISO | a kind of electronic sensitivity. Easy to understand, in as much as you always want to keep this as low as possible (the lowest value is usually 50-200). Only raise this in low light when the shutter speed and aperture are already as bright as they can be for your situation.
————————–
Biggest challenge | finding where these three settings are controlled on your camera. Considering how important they are, they can be *surprisingly* well hidden.
Practice | once you know how to control these three camera settings, go outdoors or to a very bright room. Set your ISO to something constant, usually between 200 and 500, then play with the aperture and shutter speed.
Photograph rows of cans or bottles to investigate depth of field and take photos of a running tap to understand shutter speed. It’s the easiest way to figure out what everything does (it’s also possible to watch YouTube videos on this sort of stuff, but I find it far easier to just learn by doing).
Bonus camera tip | mirrorless cameras are *far* easier to learn with than traditional DSLRs. The live screen means you can monitor your light before taking a picture, so there is far less intuition involved.
–
Our Travel Photography – Tips and Tricks
Tips For Before You Arrive
1. Practice
Like with any skill, photography gets easier the more you do it – especially mastering the manual functions on your camera.
How you see a destination through your lens evolves over time and with experience, something that no lessons can teach (although courses can be good too!).
Practice in your hometown, on your daily dog walk, with the flowers and birds in your back garden. Wherever and whenever you can. It doesn’t always seem obviously helpful, but it is.

2. Research Destinations Ahead of Time
This isn’t really any different to traditional trip planning, however, it’s worth noting if there is a particular angle, time of day or event that is particularly important for your photography.
Depending on where you go, there are usually lots of sources of information detailing how other photographers have tackled your chosen destination.
Magazines, social media, blogs, friends; anywhere you can see pictures of the places you’re keen to capture. Sometimes it’s worth having a look at photography tours to see where they showcase, too.
Tip | personally, I like Pinterest – it provides a lot of visual inspiration, plus access to blogs and photographers who are often maligned by Google.
3. Sensitivities
Be aware of any sensitivities at your chosen destination. This might include (but is not exclusive to):
Religious buildings | access and cultural norms (e.g. not taking selfies with your back to the Buddha, removing shoes in mosques, dressing appropriately).
Legalities | some countries are highly sensitive to photography. For example, it’s illegal in Saudi Arabia to take photos of people without their consent and in Germany there are strict rules on where you can point your camera.
Large cameras | are these normal in the country you are visiting? For example, in the Middle Eastern Gulf, I almost never saw someone else with a full-size DSLR type camera, whereas in Japan, every other person was carrying one! People tend to react differently, in my experience, depending on whether large cameras are the norm.

4. Choose a Hotel with a View
During your trip planning, have a quick look to see if one of your must-have captures is possible from a hotel!
I know this sounds lazy, but I’m always here for making our lives as easy as possible, and if you can get the perfect vantage point without having to get dressed, I’m a big proponent of it!
5. Check the Weather
This might be an obvious one, but ensure you’re prepared for the potential weather.
Rain | if you know you could be out in the rain, make sure you take weatherproof gear and plan for some shots that involve puddles, reflections, moody umbrella shots – anything that suits the environment!
Snow | photographing snow is often nightmarish, due to over-exposure, and is much easier with neutral density (ND) filters. Also, ensure to use your camera’s histogram, so you don’t massively over-expose your shots without realizing.
Sunny | if it’s hot, there are several potential issues. For example, with my previous camera, I struggled to move the shutter speed dial with excessively sweaty hands! I had to map the dial onto a different button whenever it was particularly fiery, so just be aware if anything like this happens to you.
Ridiculously bright, hot weather also causes very flat, faded light in the middle of the day, so avoid that where possible. Also, heat haze is a nightmare if you have to take zoom shots.

6. Plan Your Outfits/Accessories
Okay, so this one is definitely not for me (never chosen an outfit in my life and Nick looks like a homeless vagrant most of the time). However, if you’re wanting some artsy, quality photos of you or your travel buddy, plan you clothes in advance.
There’s absolutely nothing worse than your subject blending into the background of a beautiful setting, so choose complimentary colours and avoid anything that clashes.
Sometimes Nick wears a white hat. This means he stands out against natural features, for example, in a canyon or forest, plus it catches the light nicely because of the paler colour. It also draws the viewer’s eye, meaning he can still wear his trashy travel clothes without it mattering so much!


7. Think About the Images You Want to Capture
What do you want to achieve with your travel shots?
Are they for a beautiful coffee table photobook, or maybe a large print for your wall? Do you need them for Instagram?
All of the above have slightly different requirements – for example:
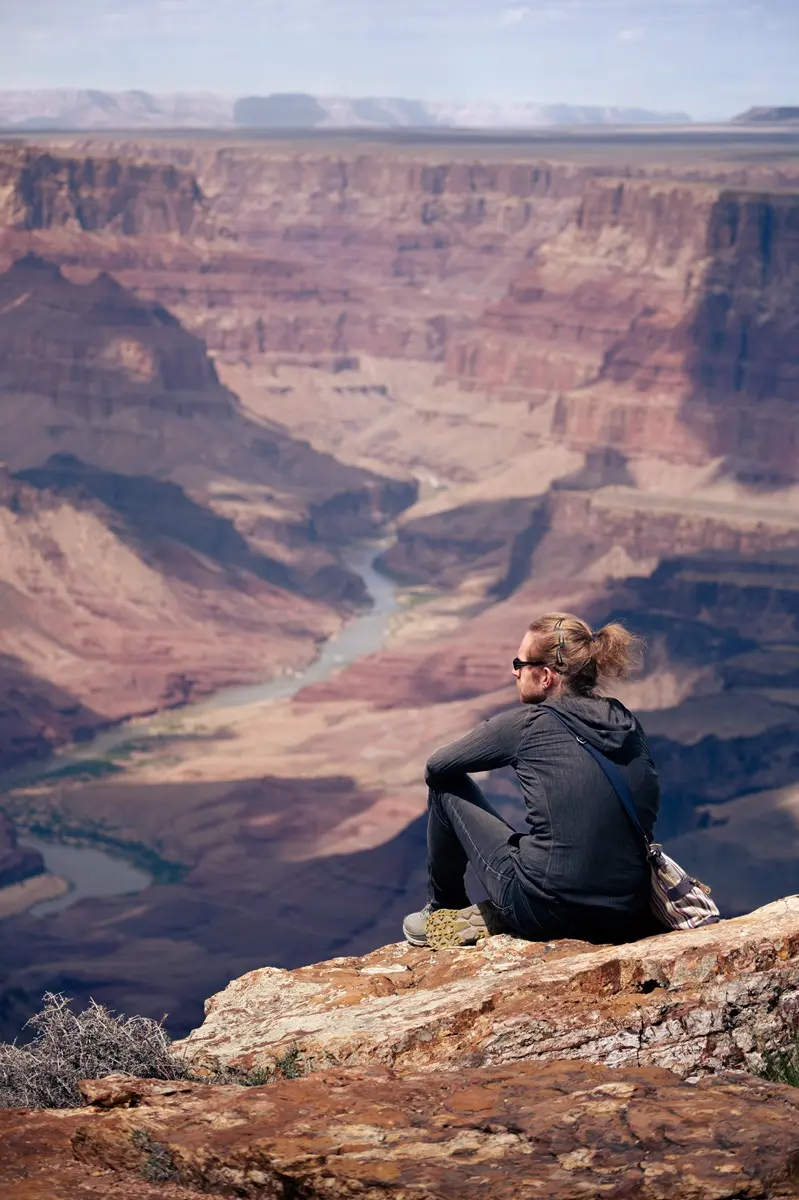
Instagram and mobile apps | these apps love vertical/portrait shots. I always take my photos on a 2:3 ratio and ensure I have a good selection of portrait options for anything I consider important (even places that are traditionally done as landscape shots, like the Grand Canyon, for example).
Printable photos | these tend to need high-resolution files and more delicate editing. This usually means taking RAW images on a proper camera.
A photobook or collage | this involves taking lots of photos with similar colours and perspectives which complement each other, then using consistent styles to process them. It usually turns out far, far better with some forward planning!


8. Tripods
Tripods are most photographer’s absolute essential item.
I’ve fallen for this narrative and now carry mine everywhere, but honestly, never, ever use it. However, I have photographer friends who swear by them, and use a tripod whenever possible, even in bright daylight. This decision is a personal one, but I’d recommend figuring it out and practicing before you arrive at your destination.
If you travel solo, a tripod is a nice addition to get photos of yourself, too.
Also, consider the in-body image stabilization (IBIS) of your gear. Our Fujifilm XT5 cameras and lenses have astonishing IBIS, meaning I can take handheld photos, zoomed to 300mm at 1/6 of a second shutter speed, without movement blur (I have a steady hand and breathe like a sniper, though).
For example, taking photos inside dark temples is totally possible without a tripod!
Tip | don’t forget to buy a remote control for your camera, too. We just have a crappy Bluetooth one but it works fine.

BEST CAMERAS FOR TRAVEL PHOTOGRAPHY
The best camera for travel is the one you have, or the one you can afford.
However, the *ideal* camera for travel photography is one that:
◊ Performs excellently in various challenging conditions
◊ Weighs as little as possible
◊ Is not bulky
◊ Is flexible for focal lengths
◊ Weatherproof
Currently, we both use Fujifilm XT5 units (weight 557g each). These are specifically designed for photographers, with all camera setting adjustments possible without using the electronic screen (this makes them super intuitive and fast to use).
The lenses we usually travel with are:
◊ Fujinon 16-55mm f/2.8 (weight 655g)
◊ Fujinon 70-300mm f/4-5.6 (weight 580g)
◊ Fujinon 18mm f/1.4 (weight 370g)
These lenses cover almost every type of standard travel photography we can think of, plus the crop sensor makes the zoom on the 300mm equivalent to nearer 450mm. It’s a super lightweight, wide-ranging set up.
Sensors | the more popular full frame equivalents by Sony and Canon are also amazing and perform slightly better in low light. However, to get the range and flexibility of performance that we currently have with these lenses would be almost impossible without many extra kilograms (and thousands of pounds for arguably negligible benefit).
Our combo is a travel photographer’s dream and we highly recommend it if you are shopping for new gear.
We very rarely take phone photos, but we use our Samsung S23 phones for the occasional happy snap.
–
Photography on Location Tips
9. Know the Sunset and Sunrise Times
Sunset and sunrise are magic for light, so it’s best to plan ahead and know when to expect them.
Shadows | I love shadows! They are the most dramatic part of any photo and I cannot get enough of them.
Shadows are longest when the sun is at its lowest, around sunset and sunrise (people rave about the light from golden hour – but rarely do they talk about those long, sexy shadows).
Crowds | many destinations are quieter during the early hours of the morning. This makes capturing the emptier city streets and landmarks far simpler than removing lots of people in post-processing.

10. Check Your Memory Cards Before Heading Out
It’s obvious, but don’t go out without checking your memory card (or taking a spare). It’s a rookie error that most people have made at some point and will destroy a big day of travel photography.
11. The Ethics of Travel Photography
There are quite a few ethical issues with travel photography, all of which are far too complex for a short section within this post. However, if you publish/share a photo somewhere, what matters most is that no is harm done. On location, consider:
◊ Is the place you’re photographing being represented fairly?
◊ Is the photo you’re taking perpetuating incorrect stereotypes?
◊ Is any major feature of your photo consenting to be photographed (including shopkeeper’s wares, for example)?
◊ Is it legal to take your picture?
◊ Where is your photo going to be displayed or published?
◊ Has the consenting person understood where these pictures may be published and the reach?
◊ Is the situation sensitive – e.g. kids, religious ceremonies, funerals?
The consent issue is a complicated topic. If ever in any doubt, whatsoever, err on the side of caution and talk to your subject beforehand.
Personally, I believe there’s a difference between photography and holiday snaps. There is an occasional time and place where candid shots are okay, but rarely in a lazy cell phone capture kind of way, and never with any kind of poverty tourism angle.
If you’ve not thought about the ethics of travel photography before, we’d highly encourage you to give it some time.


12. Shops and Wares
Although it’s usually people photography that is talked about with ethics, it’s also generally a bit off to take pictures of somebody’s precious shop wares without permission.
I’m mostly referring to places that sell specifically to tourists – think Moroccan souqs, Thai handicraft markets and products in the Grand Bazaar in Istanbul.
I don’t think anyone in a local Cambodian veg market minds you taking a photo of their carrots. (Although, you could also buy some carrots).

13. Move Your Body
When travelling, it’s easy to forget about framing and composition. It can be distracting, frenetic, or awkward, and the structure of a picture can become a secondary thought.
Tip | always take one step closer to your subject, side-step or crouch down. It often results in a very different image.
I’m bad at this one. I have to actively be thinking about moving, or I just don’t.
14. Be Aware of Your Surroundings
A few things to consider:
◊ don’t walk out into the street in front of cars (here in Bangkok, there are so many silent electric motorbikes that just creep up on me now)
◊ be aware of crime if you are carrying a camera openly (location dependent, obviously)
◊ a large camera can make people feel uncomfortable, always stash it when you are not actively using it

15. Watch Your Camera Settings
When you’re wandering about, you never know when a particularly jazzy tuktuk might zoom past, or a pretty butterfly could land on a leaf.
Either way, having your camera settings vaguely set to something that you can adapt quickly will help you capture that particularly exciting, one-off street photo.
In particular, be aware of how much light there is available and have your shutter speed set to a short enough length that you can quickly snap an unexpected, faster-moving shot. I’m happy on anything above 1/125 seconds if I have to wing it (but this depends on zoom and also the speed of the subject).
16. Don’t Be Afraid of ISO
I know ISO is something that we all want to minimise, but sometimes, it’s better to get the shot than to use too long a shutter speed. Sometimes, high ISO saves photos, especially if you are using a crop sensor camera – there’s honestly nothing worse than a perfect photo ruined by the blur of a slightly too long shutter speed (apart from Marmite – that’s worse).
This is particularly important in unpredictable environments where you are constantly changing your camera settings.

17. Keep Your Lens Clean
This is a rookie error, but be careful of your lens. This is actually way more important with phones, because a smeared, blurry lens is often the culprit of a crappy photo. Always watch for those tell-tell streaky light source lines that come from a dirty phone camera.
Camera lenses, on the other hand, are way less sensitive to dirt and marks, but ensure you regularly get your sensor cleaned. This can leave all sorts of unwanted spots on your pictures, especially at high f numbers (like f/22).
18. Pay Attention to Your Subject’s Background
If you are a taking a nice, wide aperture shot with a lovely blurry background, always pay attention to what you background is.
I can’t count the number of epic shots I’ve seen of a person, ruined by a street sign, tree branch or lamp post sticking out of their head!

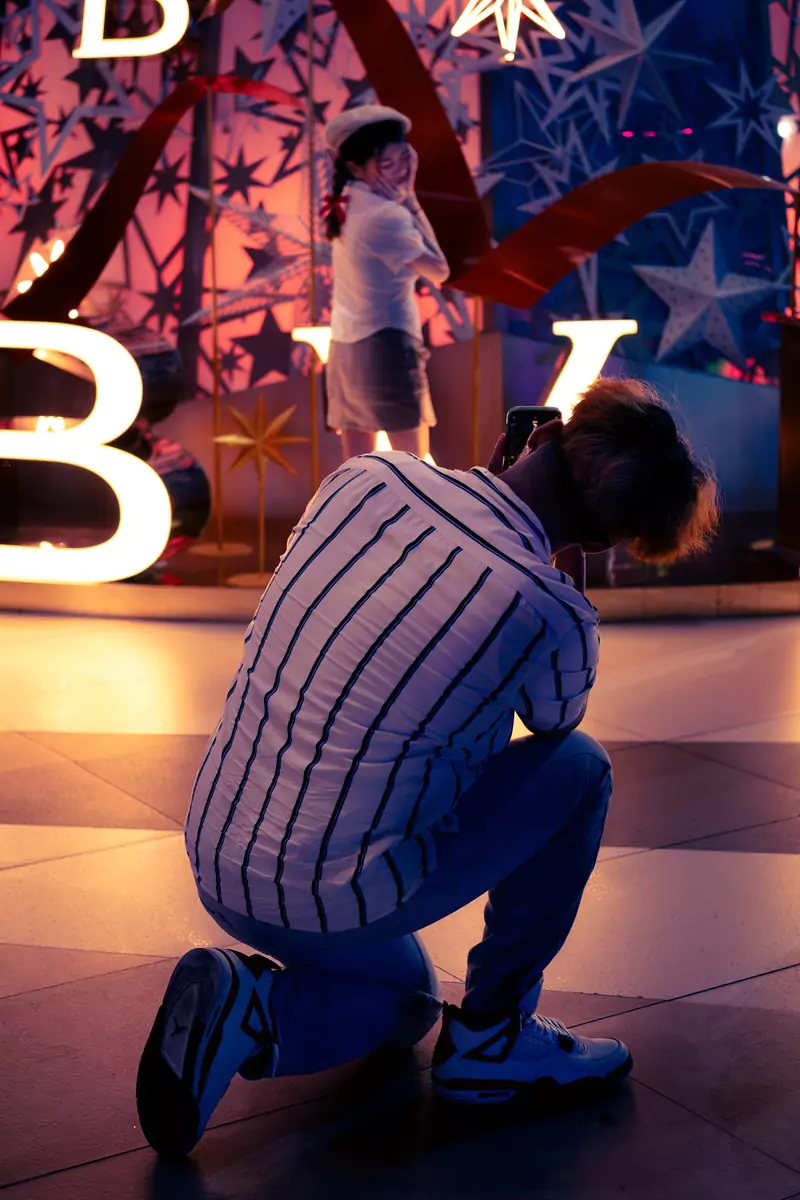
19. Don’t Neglect Everyday Moments and Objects
Although everyone wants that epic, flashy photo of the Eiffel Tower, sometimes the most noteworthy travel shots are taken of day-to-day sights, items or actions.
Also, there’s often a more interesting way of taking a photo of something famous. These types of photos are far more exciting and I’d encourage you to look for an alternative point of view.
Tip | sometimes you can incorporate something menial and ‘boring’ with your favourite landmark to really present it in a different light!
This is what really sets apart travel photography from the typical holiday snap.

PHONE OR CAMERA?
I never take photos on my phone. It just doesn’t have the same range and depth as a DSLR/mirrorless camera (plus I’m all about the zoom lenses, which a phone can never compete with).
However, lots of people take incredible photos on phones, so whatever equipment you own, learn to max out its full potential!
The saying goes: ‘the best camera is the one in your hand’, so whatever you own, make the most of it. I think almost every younger photographer in our world now (me included, although I’m not that young) started by taking photos on a phone. At minimum, it’s a great learning tool.
Newer phone cameras can take RAW format photos, have full aperture, ISO and shutter speed control, and have a fair bit of utility! Sometimes you need an app to get the most functions – have a look for your specific phone model.
Where a camera is necessary | things like wildlife shots, high-res photos (anything intended to be displayed at larger than a laptop screen), low light images, anything zoomy where you really want that narrow depth of field (my specialty).
–
RELATED | 15 WAYS TO BE A MORE RESPONSIBLE PHOTOGRAPHER
Artistic Travel Photography Tips
20. Composition
Travel photography is just the same as any other photography – the rules (sometimes) matter.
Learn about rule of thirds, negative space, contrasting colours, leading lines – then break all the rules.
I think most of these techniques come naturally after taking thousands of photos and analysing which photos have the most aesthetic results. However, it’s helpful to learn more about them and always keep them in mind.


21. Think About the Light
Using light in a creative way is more than just taking a photo at golden hour, for example.
In particular, the placement of a lamp post at night, the sun peeking through a gap in the clouds, a street vendor’s overhead light; maybe a neon sign reflecting off a rainy street; these types of light sources can just make a photo pop in a rare, special way.
Always be on the lookout. It also means that your camera has to work less hard – the lighter the subject, the easier it is to take the shot (usually)!


22. Black and White
I absolutely love black and white photos, they’re so stylish!
However, in my opinion, very few travel photos work well in monochrome (people may disagree with me on this one). In particular, landscapes very rarely work out well unless there is a very clear subject. This is because of the complexity – textures that look good in colour (like the ocean or the rolling hills of Yorkshire, for example) just do not translate well to similar shades of grey.
Tip | if you want to try black and white travel photography, ensure your photo has a substantial contrast between your subject and its surroundings. Without colour differentiating the layers, it’s surprisingly difficult to make the focus of your photo pop.
Greyscale takes real skill to work with competently. I’ve been trying to get better at this – we’ve written a post on how to take better monochrome travel photographs, plus there’s a few black and white images on our about page and our Thaipusam photography post if you want to have a look.

23. Shadows and Reflections
I mentioned it above, but shadows are the bomb. Reflections are also visually aesthetic and can elevate an otherwise dull photo into something really special.
I’ve noticed that people get obsessed with reflections, when shadows are magical. Seriously, *magical*. They’re everchanging and morphing, almost as if they were alive.
Look for the beautiful shapes and contrasts – they make for some exemplary, rare photographs.

24. Depth of Field Matters
Sometimes, all it takes is a narrow depth of field for a subject to pop, or for a photo to seem less complex in a busy environment.
Usually, a narrow depth of field is used in portrait photography to make the subject stand out, especially combined with a zoom lens to compress the background (I’ve written more about this further down).
Tip | the depth of field is (partly) controlled by the aperture (f-number) on your camera – the lower the number, the more blurred your background will be (between f/2 and f/4 is popular). However, the blur is also a result of your distance from the subject and your focal length.
I’m not a portrait photographer, at all, but I love identifying an interesting focal point and using a narrow depth of field to make it stand out. I often use a wide aperture for street photography, too, because the added blur makes my photos seem less chaotic.


25. Choose Your Subject
What your eyes experience, your camera does not. This is probably the biggest learning curve of my photography journey.
Example | if you take a busy street photography shot in a city and there isn’t a particular point of focus in your photo – a person, a flower, a goat, a carrot on a market stall – the photo will often fall flat.
This is simply because all of that magnificent chaos your eyes are seeing is not going to transfer well to a two-dimensional picture. All that commotion and disorder just looks messy and your viewer does not know where to look in the picture.
Try to choose a street sign, a shop front, a person – anything to give somewhere for your viewer’s eyes to be drawn to.
Having said all that – occasionally some crazy, chaotic photos just work, but not the majority.
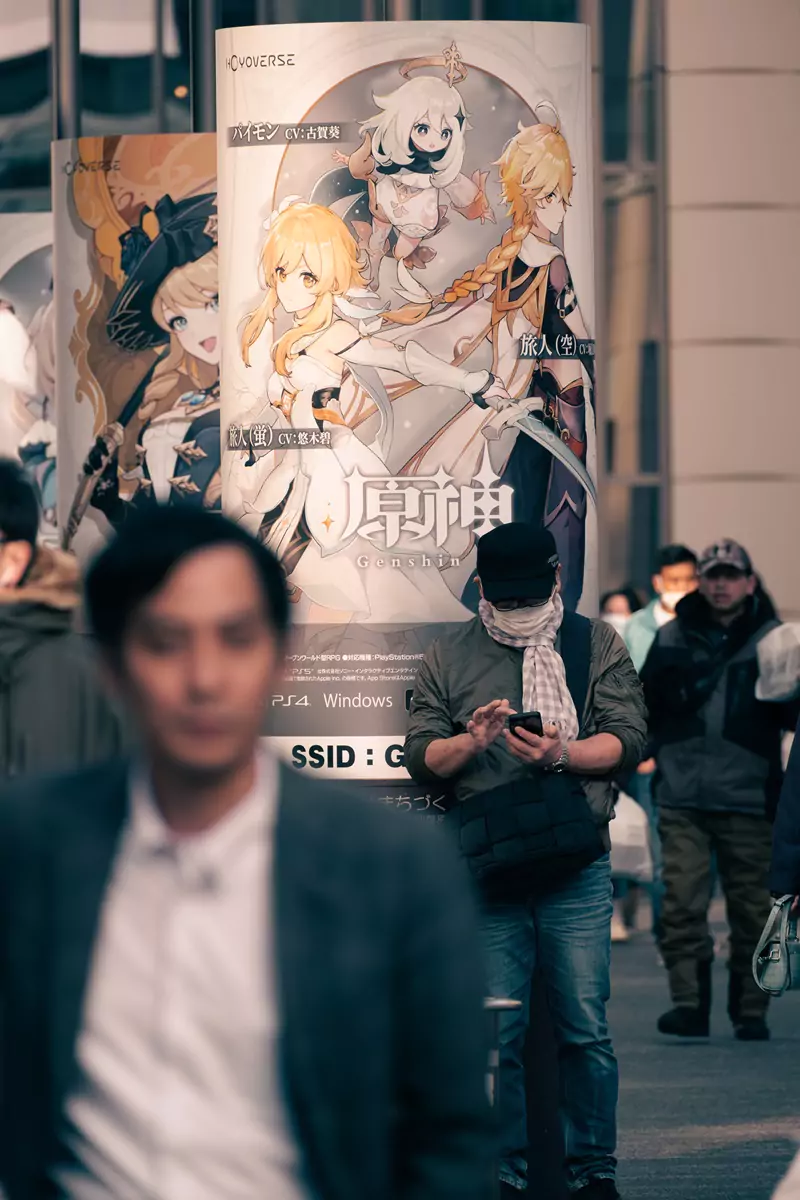

26. Repeating Patterns
Patterns are fantastic for any kind of photography – the weirder and more abstract, the better, in my opinion!
On your travels, keep an eye out for a small architectural designs, natural shapes in cliffs, water ripples, art – anything that can be cropped and made into a beautiful, artistic shot!
Tip | be careful of lines and symmetry to ensure your pattern is pleasing to the eye. Some of these aesthetic issues can be corrected in post-processing, but the more accurate you can be at the beginning, the easier everything is!


27. Framing for Perspective
It’s difficult to gain perspective when presented with a two-dimensional image.
One of the easiest ways to help a viewer experience your point of view is to use something in the foreground to give this sense of perspective.
Tip | don’t just use anything you can find! Often, it’s best to use the foreground to fill some empty space in your frame, like an abundance of sky, for example.
Tip | use a wider aperture, so lower f-number (this will depend on the distance from your subjects) to ensure your foreground is blurred and doesn’t distract your viewer.

28. Watch Your Horizon, Architectural Lines and Symmetry
Some of the most aesthetic photos I’ve ever taken are the ones that are *perfectly* lined up.
Contrastingly, many of my potentially amazing photos have been ruined by me not quite getting the symmetry right (or I didn’t quite capture the angles, etc.).
Tip | kneel down or hold your camera higher, and line up your frame to ensure the picture looks as close to straight as possible. Using the grid lines on your camera can sometimes help (although I personally find them distracting). These angles can be *slightly* fixed in post-processing – have a look at our photo editing tips.

WHAT IS A RAW FILE IN PHOTOGRAPHY?
If you’ve been reading about photography for a while, you’ll probably have heard people refer to a file type called RAW. Here’s what you need to know:
◊ RAW is just another file type, like a JPG, DNG, or PNG.
◊ RAW files are not just unedited pictures (this is a common misconception).
◊ Unlike JPGs, a RAW file is not an image. It’s more like a massive data file, which can be interpreted by software as an image.
◊ RAW files cannot always be viewed on phones, or even sometimes computers, without using particular software, like Lightroom. This means they can be a little more annoying to work with.
◊ RAW files are important because they contain more data than a JPG. This means that when you edit a file, there is far more information to work with.
◊ Editing a RAW file will always produce a better result than editing a JPG.
◊ JPG and PNG files are much smaller than RAW files. RAW files are enormous!
◊ JPG photos produced directly from your phone or camera are already highly edited by the internal software of your device.
◊ Most professionals shoot RAW, apart from a few specific niches such as sport photography, where a super-fast turn around is required.
–
Technical Travel Photography Tips
29. Do Not Neglect the Editing
Most technical photography lists like these end with a note on post-processing but, instead, I’m going to begin here because it’s important.
Photographers edit photos. National Geographic’s shots are edited. It’s not weird and if you take RAW format photos, you have no choice but to edit them!
If you want to elevate your photography from ‘holiday happy snap’ to ‘everyone wants this framed on a wall’, then you’ll need to do some editing.
Tip | Adobe products are the most popular go-to for most photographers, specifically Lightroom, which is mostly intuitive and straightforward to use. For more advanced options, Photoshop is truly excellent, but mostly unnecessary for beginner photographers.
Tip | there is a Lightroom app for mobile, which is great. There are also free apps like Snapseed, which are surprisingly effective and can do much of what Lightroom does.
For beginner editors, have a look at our common photo editing mistakes, and for intermediate editors, check out our in depth techniques to elevate your editing.

30. Embrace the Crop Sensor
If you own a crop sensor camera, or are considering purchasing a camera and don’t know what to buy, I’m here to tell you that:
*you don’t need a full frame sensor if it’s not in your budget or doesn’t meet your weight restrictions and flexibility requirements*
They can be shamed in some (stuck-up) photography circles, but I wouldn’t swap my Fujifilm system for the equivalent top of the range Sony or Canon right now.
Unrelated bonus tip | most photography circles are toxic – be prepared for nightmare men, bullying and know-it-alls.
Of course, camera choice is a personal preference at the end of the day, but don’t let anyone tell you a smaller sensor is not good enough.
After all, every photo on our website is taken with a crop sensor.
31. Know Your Gear
The best photos are taken by photographers in the know, and there’s a major limit to what the auto-settings can do on a camera. I *promise* that using your gear to its fullest will reap enormous rewards.
None of my cameras have ever had a full auto mode, so I had to learn really quickly how to use all the functions, and I’ve never looked back.
Tip | just start by ensuring you know how to adjust the three main light-based settings on your camera:
◊ ISO
◊ Shutter speed
◊ Aperture
Tip | try out other options, like aperture and shutter priority if you struggle to adjust all three at the same time (these are like a semi-auto option).
32. Work With Your Gear Limitations
Sometimes our gear isn’t perfect for a situation.
For example, if you only have a cell phone, that’s cool. It means you have a super wide lens! Look for opportunities to capture those wide skies and tall buildings. So, if you’re on a safari in Tanzania, you may not be able to get that lion’s mane up close, but you can capture a sunset over the panoramic landscapes surrounding you instead.
The same goes for a camera. If you only have a certain lens with you – lean into it – hard. I actually only take photos on my 70-300mm, probably 90% of the time. I’m detail oriented and I love that the lens forces me to view things differently and results in super unique photos.

33. Travel Photography Benefits From RAW Files
I cannot stress this enough – take all your photos in RAW format. If you don’t know how to manipulate a RAW shot currently, take your photos in ‘RAW and Fine’. This will give you a JPG and a RAW format for every photo you take.
Specifically, the unpredictability of travel photography means that you will likely take some sketchy shots that may need to be rescued in post-processing. This is not unusual, unlike a studio shoot where the environment is always perfectly controlled.
Any photo that needs correcting will look so much better when edited as a RAW. Even simple editing functions, like bringing up the shadows on a slightly underexposed shot, is a straightforward task and you’re unlikely to lose any detail. You can also only use the very helpful Lightroom denoise option with RAW files.
Plus, one day, you’ll be this super-skilled photographer and editor, looking back on your old photos and desperately wishing that they were taken in RAW so you could do an amazing job re-editing them.
This is me, every day (maybe not the super-skilled part).
Tip | be aware that RAW files are gigantic, so delete unwanted photos regularly or you’ll end up with an online storage pandemonium like mine – you really don’t want that.
34. Skies Shouldn’t Be White
Skies can be a photographer’s absolute worst nightmare. If a sky is not exposed correctly, it *will* ruin a photo.
So, if you are photographing outside, make sure you don’t washout (over-expose) your sky.
Tip | it all looks a bit technical, but cameras come with histograms. These nifty little graphs indicate if parts of your photo are likely to be over- or under-exposed. If the lines are bunched up by the right side, you probably need to reduce your shutter speed. We’ve talked a little more about this in our photo editing guide for travellers.
Tip | if in doubt, under-expose your entire scene. It’s easier to recover in post-processing than an over-exposed sky.
35. Don’t Be Afraid of Zoom
If you go on any travel photography forum, anywhere, most people will recommend you use a wide-angle lens for travel (so shorter, 8-23mm type lengths).
I mentioned already above, but I mostly live with *only* a zoom lens, and rarely miss a single shot of something I want to take.
It’s all about seeing through your chosen lens. I’ve started looking at my surroundings in tiny, cropped boxes and it provides so much flexibility and opportunity to take in the details and small moments.
It also leads me onto the point below!

36. Background Compression
So, here’s a weird phenomenon:
Zooming in on your subject using a longer focal length lens produces a completely different result that if you just simply stepped closer to your subject.
Mentally, this is counterintuitive, however there’s lots of cool optics involved that actually makes your subject look closer than they are to the background.
It’s based on the ratio of the distances between you and the subject, and you to the background. It sounds all mathsy, which I guess it is, but I promise it makes sense.
There are lots of physics diagrams to explain it and it’s actually pretty logical, but just be aware of the benefits and distinctions of using longer focal lengths (like I said above, I almost exclusively use a 70-300mm, therefore many of my photos demonstrate this cool compression).
Tip | experiment with different focal lengths with your subject, stepping back a few steps, then zooming more. You’ll see this curious feature coming through in your pictures!
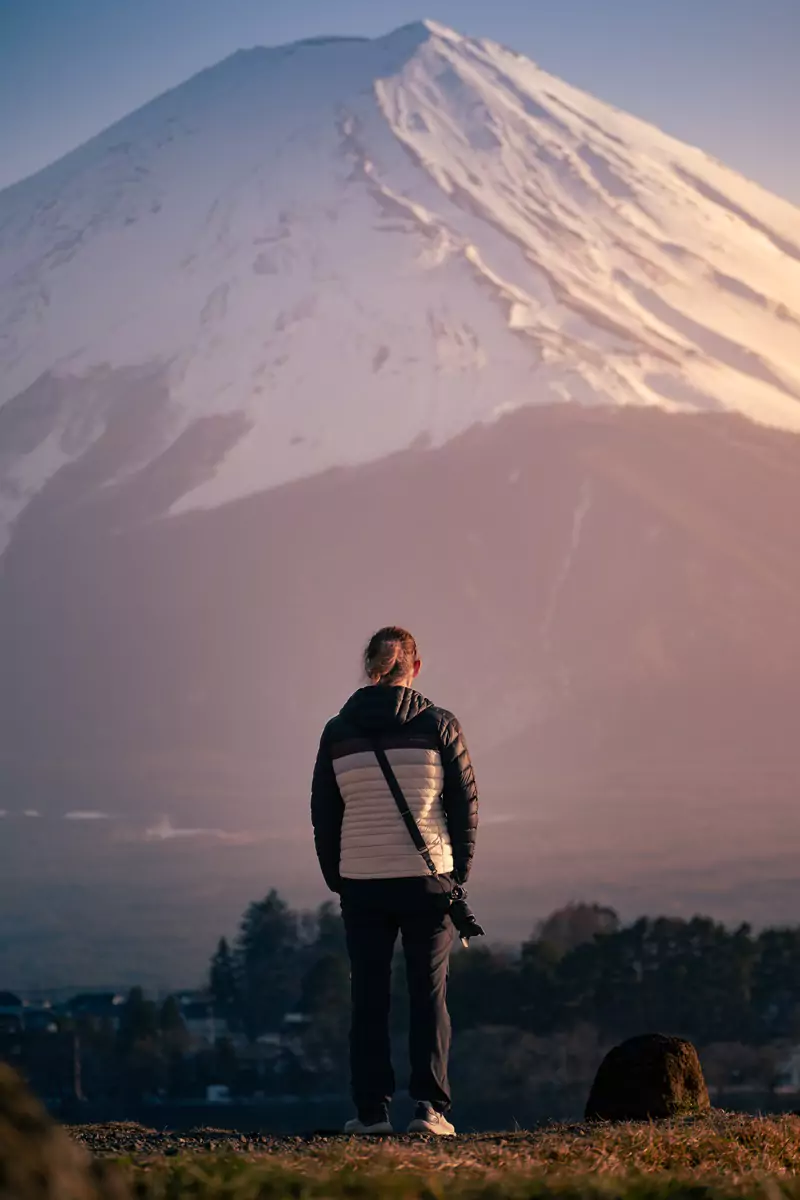
Final Thoughts – Travel Photography Tips
Travel photography is simultaneously the most exciting and most stressful hobby I’ve ever had. The pressure I feel to take the absolute best shots from a location is high – although this is entirely self-inflicted.
The thing is, travel photography often provides these fleeting, once in a lifetime opportunities and, if you’re not ready to capture them, they’re gone. Sometimes, in the blink of an eye, never to repeat themselves.
Successfully documenting the world’s transitory flashes and pulses is my personal highlight. Being able to do this adequately has taken many years of practice, and I’m super happy to share how I approach it. I really hope these hints, tips and suggestions make it possible for you to enhance your game and elevate your photography!
If you’re looking to up your photo game even more: for beginner editors, consider having a read of our common editing mistakes and solutions, and for more advanced editors, have a look at our travel photo editor’s guide.
Have a great day!
Hi, thanks for visiting our blog! If this post has been of help to you, or you’ve just enjoyed our random ramblings and musings, say thank you by buying us a coffee! It helps keep The Restless Beans blog up and running.
Thank you, Claire + Nick


